12/26/2012

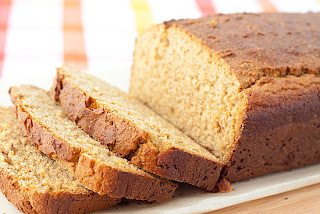
It Is Really A Perfect Homemade French Bread Recipe

This bread will knock your socks off! It's pretty simple, and super delicious! Once you start eating it, its hard to stop, especially when there's butter and the loaf came right out of the oven!


Homemade French Bread Recipe

Ingredients:
  • 5-6 cups all-purpose or bread flour
  • 5 teaspoons active dry yeast
  • 2 teaspoons salt
  • 2 cups warm water
  • 1 tablespoon butter, melted
  • 1 egg white
  • 1 tablespoon water
Preparation Instructions:

1. In a large bowl, combine 2 cups flour, yeast and salt. Stir in 2 cups warm water and melted butter, and beat until well blended using a stand mixer with a dough hook attachment. Stir in as much of the remaining flour as you can.

2. On a lightly floured surface, knead in enough flour to make a stiff dough that is smooth and elastic. Knead for about 8 to 10 minutes total. Or knead in your mixer with the dough hook for 8 minutes on low-medium sped. Shape into a ball. Place dough in a greased bowl, and turn once. Cover, and let rise in a warm place until doubled.

3. Punch dough down, and divide in half. Turn out onto a lightly floured surface. Cover, and let rest for 10 minutes. Roll each half into large rectangle. Roll up, starting from a long side. Moisten edge with water and seal. Taper ends.

4. Grease a large baking sheet. Place loaves, seam side down, on the prepared baking sheet. With a very sharp knife, make 3 or 4 diagonal cuts about 1/4 inch deep across top of each loaf. Lightly beat the egg white with 1 tablespoon of water, and brush on. Cover with a damp cloth. Let rise until nearly doubled, 35 to 40 minutes.

5. Bake in a preheated 375º F oven for 20 minutes. Brush again with egg white mixture. Bake for an additional 15 to 20 minutes, or until bread tests done. If necessary, cover loosely with foil to prevent over browning. Remove from baking sheet, and cool on a wire rack.

12/19/2012

Chinese Steamed Crabs Recipe

Actually in a way there is nothing particularly Chinese about this dish. It's a simple straightforward preparation that celebrates fresh seafood for it's sea sweetness and tender succulence. Or maybe I should take that back. Thinking about it, this dish is actually very representative of the manifestos of Cantonese cookery. Freshness first, then simple yet subtle preparation to bring out the best of the natural taste of the fresh food. Anyways this is one of the many styles in which the Chinese eat crab which they love in general with a passion.

Flower Crab, which is very common here in Hong Kong and has a very tender sweet flesh. These are smaller blue crabs with spots on their shells and legs. We have found that smaller crabs tend to have sweeter meat but you have to work more to get at the meat while larger crabs have much more meat but a tougher chewier texture.

Toss the crabs in the fridge to knock them out before steaming and make sure you have some of those nut cracker things on hand to break up the shells. Unless you're like my mother in which case just bring your teeth to the table and you'll be fine.


Chinese Steamed Crabs Recipe
  • 3 small crabs or 2 large crabs, live
  • 2 teaspoons ginger, sliced into very thin matchsticks
  • 1 tbsp Chin Kiang Vinegar
  • 1 tbsp soy sauce
Boil the water in a large steamer. Wash the crabs and place in a large dish that will fit into the steamer. When water is boiled, place the dish into the steamer, being careful of the hot steam. Steam for 15 minutes. Take out of steamer and serve along with two small sauce dishes of 1) Ginger and vinegar 2) Soy Sauce. Eat with or without dipping into the sauce, it depends on your preference. For myself I like to eat it without dipping mostly. The meat it so yummy already!

12/11/2012

Miyuk Guk The Traditional Korean Birthday Soup

Miyuk Guk is Korean seaweed soup. "Miyuk" refers to wakame, a type of seaweed abundant along the long Korean coastline. This warming and delicious comfort food is made with fragrant garlic, seaweed, and either fish broth with shellfish or beef broth with sliced beef. I love the story behind this celebratory Korean “birthday soup” recipe, which everyone eats not only on his or her birthday, but also year-round. Its association with birthdays in particular stems from the ritual of feeding Miyuk Guk to women who have just given birth. Their traditional wisdom knew that the soup gave the women strength and restoration from the nutrient dense broth, seaweed, and beef or seafood.

  
Ingredients:
  • 1/4 cup dried wakame (0.3 ounces) – Whole Foods generally carries a good selection of dried seaweed, and you can also try finding it at your local natural foods store or an Asian market
  • 3 cups beef bone broth
  • 5 cloves garlic, minced
  • 2 TB sesame oil
  • 2 tsp fish sauce
  • 2 green onions, thinly sliced
Directions:
  1. Soak 1/4 cup dried wakame in 2 cups of water for 20 minutes. Drain, rinse 2 or 3 times, and drain again. Squeeze all the water out of the seaweed. At this point we had 1 cup of soaked wakame. Coarsely chop the wakame into bite sized pieces.
  2. Heat the broth over medium low heat. Add the seaweed and the garlic and bring to a gentle simmer. Cook for 10 minutes to infuse the broth with the garlic flavor.
  3. Stir in the sesame oil and fish sauce.
  4. Ladle into bowls and garnish with the green onions.

12/05/2012

This Lemon Cheese Cake Recipe Is Really Wonderful

Enjoying delicious cake is always the happiest thing for me, and I believe that it is the same to most people, I always try different flavors of cakes at home. Lemon cheese cake is really a good one, it taste fresh and it is also healthy, all of my family love it very much, and this cake is so easy to decorate too, it makes it more attractive. Here is an easy recipe you can follow, if you are interested in it.


Ingredients:

For the Cheesecake layer
  • 3 (8 oz. each) cream cheese, softened
  • 1 c. sugar
  • 1 c. sour cream
  • 3 eggs
  • 1 Tbsp. vanilla
  • For the Lemon cake layers
  • 2 lemon supreme cake mixes
  • 8 eggs
  • 2 c. buttermilk
  • 2/3 c. lemon juice
  • 2 (3.4 oz. each) instant lemon pudding mixes
  • 2/3 c. oil
  • 3 (10.6 oz. each) vanilla Cool Whip frosting
Instructions:

For the Cheesecake layer
  1. Beat the cream cheese and sugar until fluffy. Add in the sour cream, eggs, and vanilla and beat until creamy.
  2. Pour into a 10" springform pan that has been lined with parchment paper. Bake at 350* for 45 minutes. Cool on a wire rack for 1 hour. Run a knife around the edges, but don't remove the pan. Chill overnight.
For the cake layers
  1. In a mixing bowl combine 1 cake mix, 4 eggs, 1 c. buttermilk, 1/3 c. lemon juice, 1 box lemon pudding, and 1/3 c. oil. Beat for 1 minute on low, and then 2 minutes on medium.
  2. Pour into a greased and floured 10" round cake pan. Bake at 350* for 42-44 minutes. Cool in the pan for 15 minutes and then flip onto a wire rack to cool completely. While the first layer is cooling, repeat with the other cake mix and the rest of the ingredients.
  3. To assemble the cake, level both lemon cakes. Place on cake on a plate and smooth on a thin layer of cool whip. Place the cheesecake on top. If the layers don't match up you can use a knife to very carefully remove the sides of the cheesecake to fit. Smooth a thin layer of cool whip frosting on top of the cheesecake. Place the last cake layer on top of the cheesecake. Smooth the Cool Whip frosting over the top and sides of the cake. Decorate with fresh raspberries if desired. Keep refrigerated.

11/27/2012

How To Make Traditional And Delicious Chinese Almond Cookies

Chinese almond cookies are a trademark in Chinese-American cooking. Often relegated as a second string sweet to the more entertaining fortune cookie these don't get the respect they deserve. Sure, they don't tell you what a charming personality you have or offer a string of lotto numbers, but they do have a crisp bite and delightfully sandy texture. Almond flour, almond extract, and slivered almonds ensure that you get an intense flavor that will eclipse any paper filled treat.


Ingredients:
  • 1 1/3 cups of almond flour, lightly packed
  • 1 cup of unsalted butter, chilled and cut into cubes
  • Pinch of kosher salt
  • 1/2 teaspoon of baking soda
  • 2 eggs
  • 1 teaspoon of almond extract
  • 1 cup + 2 tablespoons of sugar
  • 1 3/4 cups of flour
  • Thinly sliced almonds
How to cook:

1 Place the almond flour, salt, and butter into an electric beater with a paddle attachment and beat on medium speed for three minutes. The mixture will become course and chunky looking.

2 Add one of the eggs, reserving the other for later, and the almond extract. Mix on low speed until just incorporated.

3 Sift together the flour, sugar, and baking soda then add to the butter mixture at low speed. Mix until just combined.

4 Take the dough and flatten it into a disc and wrap in plastic wrap. Place it in the refrigerator for two hours to chill.

5 Preheat the oven to 325F. Line a baking sheet with parchment paper. Place the other egg into a bowl and beat it.

6 Take pieces of dough and roll them into balls about a half-inch wide. Place them on the sheet about and inch apart and then press them down slightly with your palm to make a coin shape.

7 Place a slivered almond onto each cookie and lightly press it into place, then paint the surface of the cookie with some of the beaten egg using a pastry brush or your finger (this will give the cookie a lacquered appearance once it bakes). 8 Bake for 13-15 minutes or until the edges just being to tan.

11/20/2012

How Sashimi Is Different From Sushi

What is a sashimi? This is a popular question that we have been hearing lately. Is it sushi? Is it raw fish? Is it safe to eat? Where can i find it?

Sashimi is raw fish, but different than sushi. Raw fish is usually an ingredient in sushi, but sashimi is raw fish. You can find these in most Japanese and sushi restaurants and is often times served on top of a small amount of rice. There are many different types of sashimi all depending on the type of fish it comes from. Some of the more popular ones are Salmon, Tuna, Shrimp, Sea Urchin, and Yellowtail.


So what is sashimi and how does it taste? Well we think it taste delicious, however if you are still new to raw fish it is usually easier and better to ease yourself into it by starting with sushi first. When it comes to raw fish, or any raw meat for that matter, many people are nervous, scared or revolted by the thought of it and can take some getting use to. Once you work your way up to it we think you will love it.

Sashimi dishes are also very healthy because they normally contain only raw fish and rice. It can also be eaten by itself with no rice at all and is a great source of protein and essential nutrients.

When eating sashimi it is also important to be aware of the dangers and risks that are involved with eating raw fish. While problems from eating raw fish or sashimi are rare, they are real and do occur. Often times fish is required to be freeze blasted for a number of days in order to kill off any parasites or bacteria that could be present. Make sure you are ordering your sashimi from a reputable restaurant who knows how to handle raw fish and that follows the rules. This is also more common in fresh water fish than in salt water fish so it may be good to stay away from those types of fish.

11/13/2012

How To Prevent Fish From Sticking When Cooking

A while ago on the Reluctant Gourmet Cooking Forum, there was quite a lengthy discussion of how to properly pan fry or saute fish to prevent it from sticking. There was so much conversation about it that I thought it would make a good article. I think we've all experienced that awful feeling when you try to turn your fish in the pan and it just won't turn. Hopefully this lesson will give you the tools you need to perfectly cook a piece of fish.

The first thing to understand about fish is that it is very high in protein while also being relatively low in fat. This can make for a very healthy meal, but it also is a recipe for disaster if you don't know what you're doing. Believe me - I've been there.
Protein sticks. It is what glue is made from. If proteins are allowed to denature - chemically unravel - slowly, they stick firmly. Ever try to clean up egg white that has spilled onto and dried on the stove top? It is a mess.

Since proteins stick when they slowly unravel, you have to make sure that they cook quickly. This means that the heat must be high enough to start setting the proteins immediately.


As was pointed out in the discussion on the forum, browning doesn't start until 320° F, so the surface of your pan must be at least that hot before you add the fish.
Since the temperature in the pan will drop when you add the fish, make sure that the fish isn't at refrigerator temperature so the heat will recover more quickly. Take your fish out of the refrigerator at least fifteen to thirty minutes before cooking.
Preheat a well-seasoned cast iron skillet or other wide, heavy-bottomed pan over medium-high heat until a few drops of water immediately boil violently and evaporate after only a couple of seconds. This is a great way to know when a pan is hot enough to saute or pan fry.

If your recipe says to rinse the fish off before cooking, make sure that you pat the fish dry. You'll most likely be cooking the fish in butter, oil or some combination and fat and water don't mix. So make sure you remove as much water from the surface of the fish as you can.

Add just enough oil to coat the bottom of the pan. Remember we are talking about pan frying or sauteing, not shallow frying. The distinction of these terms will be discussed in a future post because the more I read about these two cooking techniques, the more confused I get. If you tend to be heavy handed with the oil, you can just brush some directly on the fish.


Let the oil heat up until it shimmers in the pan before adding the fish. If you've brushed the oil directly on the dry piece of fish, just place it in the pan, skin-side down, and let it sit. I say skin side down because most chefs I've talked to about this say you always put the finished side (the side that will be seen when plated) down first.

I'm not sure but I think it's because the pan (or grill) is hottest just before you add the fish and you get the best grill marks. When the fish hits the pan, it absorbs some of the heat and cools down a little. Doesn't it always seem the flip side of whatever you're cooking doesn't have as good grill marks?

As I was reading over the forum discussion, one sentence jumped out at me: "I didn't move it in the pan until it was time to turn." Remember you mom always tell you not to play with your food? The same is true when cooking fish, or any protein for that matter, the only way you will know when it is time to turn it is when the protein naturally releases from the pan.

If you are relying on a recipe's instruction to "turn after three minutes," you could run into trouble. When a protein has browned nicely, it will release from the pan with minimal sticking, if any at all.

Place the fish skin-side first in the pan and do not move it until it lets you. Adjust the heat so you hear a good sizzle but not any very loud sputtering and popping, and allow the fish to cook and develop a nice sear. It takes as long as it takes, but don't walk away from it. You have to be ready to turn it when it is ready to give.

Once the fish releases, turn the fish and let it cook until it is firm and opaque but not yet flaking. If you let it flake in the pan, you will end up overcooking your fish due to carryover cooking. If cooking a thicker cut of fish to be finished in the oven, the same searing technique applies. Place the presentation side of the fish in the hot pan and let sear until it releases. Turn the fish, sear until lightly golden and then finish in the oven until the fish is firm and opaque but not flaking. Again, carryover cooking comes into play, so make sure you allow for that.

11/08/2012

An Easy And Healthy Pineapple Pudding Cake Recipe

Pineapple Pudding Cake is an easy to make, creamy and moist cake. This recipe makes an excellent Birthday cake during those hot summer months!


Ingredients:

* 1 package (9 ounces) yellow cake mix
* 1 package (8 ounces) fat-free cream cheese
* 1 package (1 ounce) sugar-free instant vanilla pudding mix
* 1 can (20 ounces) unsweetened crushed pineapple, well drained
* 1 carton (8 ounces) frozen fat-free whipped topping, thawed
* 1-1/2 cups cold fat-free milk
* 1/4 cup chopped walnuts, toasted
* 20 maraschino cherries, well drained

Instructions:
  1. Prepare cake mix batter according to package directions.
  2. Pour batter into a 13×9-inch. baking pan coated with cooking spray.
  3. Bake at 350 degree F, for 20 minutes or until a toothpick inserted near the center comes out clean.
  4. Let it cool completely on a wire rack.
  5. Meanwhile, in a large bowl, whisk milk and pudding mix for 2 minutes.
  6. Let stand for 2 minutes or until firm.
  7. In a small bowl, beat cream cheese until smooth.
  8. Add pudding mixture; beat until blended.
  9. Spread cream mixture evenly over the cake.
  10. Top with pineapple and whipped topping.
  11. Sprinkle with walnuts.
  12. Garnish with cherries.
  13. Step13: Refrigerate until serving.
  14. Step14: Pineapple Pudding Cake is ready to serve. Enjoy!!

11/01/2012

The Basics For The Indian Native Food

If you're likely to adhere to a good Indian native meals formula for the loved ones, you have to very first end up being focused on which the fundamentals associated with Indian native cooking food. In the following paragraphs, the most popular elements associated with Indian native meals formula is going to be provided and also the various cooking food methods that you might end up being directed to complete will be described.

First, the reason why do you decide to prepare a good Indian native formula? Indian native food is actually cherished through numerous simply because apart from this becoming scrumptious, full of taste, as well as becoming simple to put together, it's wholesome. 1 meal may have a correct quantity of herbal treatments as well as spices or herbs, proteins, as well as carbs. That might be a great wholesome well balanced dinner, correct?

Therefore, for that very first cease, let us talk about things that you will probably end up being detailed upon each and every Indian native meals formula. You will find 3 options that come with Indian native meals. They are the actual herbal treatments as well as spices or herbs, natural oils, as well as condiments. Herbal treatments as well as spices or herbs are utilized to include taste towards the meal. Cautious mixing of those elements tend to be among the crucial to some scrumptious Indian native meals. Here are a few good examples:


Turmeric, the yellow-colored natural powder created from the ginger underlying family member, increases the stinky as well as sour taste associated with a number of meals. Coriander, possibly within seedling or even natural powder type provides taste as well as fragrance. Red-colored chilies supply much more colors as well as flavor towards the meals. Cardamon can be used with regard to tasty as well as fairly sweet meals.

An additional essential function associated with Indian native meals may be the natural oils utilized. In contrast to within additional cultures' method of cooking food, Indian native food will pay excellent focus on the actual essential oil to become utilized. Particular kinds of essential oil are utilized based on exactly what meals has been ready. You should understand what essential oil is actually befitting the actual meal because this can increase the taste.

10/25/2012

Simple Tips To Cook Pasta At Home

Pasta is the simplest of Italian foods. It is the most widely known and can be found all over the world. But it is easy to go wrong with it and to end up with a soggy uninspiring mess.
As with all the most basic foods the key to cooking good pasta is to choose good quality ingredients. The simpler the food the more important quality becomes. Poor quality can be less easily disguised in a simple pasta dish than in something more elaborate.
Good quality pasta is made from durum wheat. Many people swear by fresh pasta rather than dried. They feel that fresh pasta must be more authentic than dried. But in Italy cooks will often choose dried pasta for preference. A good quality dried pasta made from durum what is always preferable to a poor quality fresh pasta.
What you are looking for is a dried pasta made with 100 per cent durum wheat and preferably made by an Italian company according to traditional methods. Avoid supermarket own brands and other cheaper substitutes. Only the real thing will do.
If this seems too expensive then save money when it comes to the sauce. Pasta is a cheap food because it carries the sauce and makes expensive ingredients go further. You should not think of pasta as an economical food because the pasta itself is made from cheap ingredients.
Some fresh pasta is excellent. If you can find shop where they make it themselves it is well worth buying. You might even like to try making it yourself. There are wonderful gadgets for rolling out sheets of pasta. But these pasta machines usually end up forgotten in the back of the cupboard. They are not really necessary. You will rarely find them in an Italian kitchen. Home made pasta can be made quite easily with a rolling pin and a knife.
The water must be brought to a good rolling boil before the pasta is added. Bring it back to the boil as quickly as possible after the pasta is added and keep it boiling until the pasta is done. Do not put a lid on the pan.
Salt is important in cooking pasta. The water must be well seasoned with salt for pasta. Without salt you pasta will be bland and dull.
Some people like to add oil to the water. They believe that this will stop the pasta sticking together. This is not true, because the oil stays on the surface of the water and does not touch the pasta. But oil can help to prevent the foam that is produced when cooking pasta from boiling over the side of the pan.
Most packets of pasta have a cooking time printed on them. Treat this as a rough guide only. You must judge whether or not the pasta is done by touch. Lift out a piece of pasta from the boiling pan and squeeze it between the nails of your thumb and forefinger. If there is still a slight resistance then the pasta is done. It is, as the Italians say, al dente. There is some "bite" left in it. Your pasta is then ready to serve with the sauce of your choice.

10/18/2012

Let's Try Nice And Easy French Recipes At Home In Less Time

Despite new styles of cooking, French food still indicates genuine meals preparation by using natural items from different areas. Cooking home-made meals and eating at the desk together make your hunger develop more powerful. The task is to merge things together to get the best flavor out of them. Let's try few nice and easy French recipes at home in less time.


Cajun Deviled Eggs Recipe:
  • 6- eggs
  • Dijon mustard
  • 2 tsp. Mayonnaise
  • ¼ tsp. Red pepper powder
  • ¼ tsp. ground Black pepper
  • ½ tsp Salt
Method:
  1. Firstly boil the eggs in water. Take a sauce pan fill it with water so that eggs get completely dipped in it.
  2. Bring it to boil. Switch off the flame and keep them covered in the pot for 10 minutes.
  3. After 10 minutes take them out of the pan. put them in cold water.
  4. Peel them and cut into 2 halves.
  5. Separate the Yolk and white of the egg.
  6. Mix mayonnaise, Dijon mustard, black pepper and salt to the yolks and nicely mash them.
  7. Fill the eggs with this mixture and sprinkle red chilli powder over it.
  8. Refrigerate it and serve chill with tea, coffee or cold drink.
Raspberry pie:
  • 2 cups- flour
  • 2 cups- Sugar
  • 1/2 tsp. Salt
  • 3/4 cup Shortening
  • Egg (lightly beaten)
  • 3 tbsp. Cold water
  • 1 Tbsps.- White vinegar
  • 2 tbsp.- Quick cooking tapioca
  • 2 tbsp.- Cornstarch
  • 4 cup- fresh unsweetened raspberries (thawed)
  • 1 tbsp.- Butter
Method:
  1. Take a large size bowl and mix flour, salt and sugar (acc. to taste). Mix until coarse crumbs are made.
  2. Add a egg, vinegar and water, stir well.
  3. Make 2 parts of dough, one bit large than other. Wrap them and refrigerate for 30-40 minutes.
  4. Meanwhile, in a medium size bowl mix- tapioca, sugar, raspberries and cornstarch. Set aside for 20-25 minutes.
  5. Sprinkle some dry flour on the surface. Roll out the larger dough in 6-8 inches.
  6. Transfer the dough to pie plate and add raspberry filling and butter.
  7. Now roll the smaller dough and put over the filling in pie plate.
  8. Now flute the edges of the pie. From the top cut the slits.
  9. Brush up butter and sprinkle sugar on it.
  10. Bake at 350 degree Celsius. Keep on checking in between till crust is golden brown and bouncy.
  11. Let it cool down and its ready to serve.

10/03/2012

Eating Italian Food During Your Italy Vacation

When you pay a visit to Italy ,you can enjoy the beauty of the country and Italian food by wearing the holiday dresses.You may get your fill of these classics while you are in Italy, but you will also want to make sure you get your fair share of local delicacies too. Make sure the food you eat is made from locally grown ingredients, and make sure you pair the food with some great wine and you will be experiencing Italy at its best.Italian food will be very important to you during and after your vacation in Italy. Most people are usually surprised by the diversity of food in Italy, especially if they expect to eat pizza, pasta and spaghetti during their time their.
Italian food is classed into 3 regional types. Northern, Central and Southern. While visiting Northern Italy, you will find that the food here is less “Italian” than you would expect. For example they use less olive oil and more butter. They also eat more rice and corn polenta here than pasta, and tomato sauce is not used very often. Northern Italian food also includes a lot of wild game found in the countryside. These include wild fowl, rabbit and quail. Northern Italy also has some coastal towns as well as some towns and villages near streams and rivers. So if you visit Northern Italy during your Italy vacation, you may eat a lot of seafood and fish.
What we know as “Italian food” comes from Central Italy. Olive oil, cheeses and rich tomato sauces all hail from central Italy. The coastal areas here are also well known for seafood. Italian cooking was said to have been born in Tuscany, which is a region in Central Italy. Some of the best olive oil comes from Southern Italy. But very little of it is exported so make sure you sample the olive oil here during your Italy vacation. Naples, a city in this area is well known for its pizza and southern Italy as a whole grows a lot of citrus fruits and has many vineyards. Some of the best wines in the world come from Southern Italy.
You may eat at several local restaurants during your vacation in Italy. However one of the best ways to sample some of the different food that Italy has to offer during your vacation is to take a cooking class, or make your vacation a culinary one. Many of these classes and culinary vacations include going on a winery tour or wine tasting events. Cooking classes can range from a few hours, to half a day and they range in price from about $150 to $250. Many of these are hosted by families in homes or small inns. Some of these classes are taught by excellent chefs many of whom have written Italian recipe books and manage restaurants. They will teach you which food goes with which wine to make for a delicious meal. During your Italy vacation you can also learn how to make your own homemade spaghetti and authentic tomato sauce.

8/12/2012

How To Make A Quick And Easy Potato Salad

You can make a quick and easy potato salad from stuff you’ve got on hand—assuming that the “stuff” includes potatoes, of course. There’s nothing magic about it, just go into the “crisper drawers” in your fridge and see what you can chop up and add to potato salad.


Ingredients
  • 3-4 medium potatoes
  • 2 tbsp Salt for cooking potatoes
  • ½ cup chopped onion
  • 2/3 cup other fresh chopped vegetables—whatever you have: celery, bell pepper, jalapeno, zucchini, carrots
  • 2 tbsp finely diced pickle
  • 2-3 tbsp mayonnaise or "salad dressing"
  • 2 tsp mustard
  • Seasonings—salt, pepper, cumin, garlic powder
Instructions
  1. Get out a large bowl, cutting board, chef’s knife, colander and big pot for the potatoes.
  2. Rinse potatoes well, blot dry and cut to about ¾ inch or so pieces.
  3. Fill pot with enough water for the potatoes to cook without being crowded and add salt to the water. Dump in the cut potatoes and turn burner to medium high.
  4. Chop onion and any other vegetables you're using. Put into the bowl. Dice the pickle and add it.
  5. Put colander in sink. When potatoes are just fork tender, turn off heat, remove pan and dump potatoes into the colander. Then rinse with cold water and thoroughly
  6. Add 2 tbsp "mayo", 1 tsp mustard, salt, pepper, cumin and garlic powder (plus I like a bit of dried dill too) and mix thoroughly. Taste it! If it’s a bit dry add another tbsp of mayo. If it's too "bland" add another squirt of mustard. Do all this to taste.
  7. Cover with plastic wrap or a lid and put in the fridge. When ready to serve taste it again! Sometimes it get "dry" sitting in the fridge as the potatoes absorb some of the moisture from the mayo. Add a bit more of whatever you think it needs and taste again.

7/24/2012

Easily Ways To Cook The Delicious Shrimp

Maybe many people like to eat the shrimp,me too.But most of the people do not know how to cook the delicious shrimp.Shrimp is a fabulous choice to get some lean protein on your plate. It’s inexpensive, especially when purchased frozen, plus it defrosts in minutes. If you’re looking to tame your waist line, most sea food can help you do that. Stow away a few packages of these tasty crustaceans in your freezer for future meals.
The ginger in this recipe is meant to give that gentle spice that hits the back of your throat, and the intent for the fresh lemon juice is to bring other flavors to the forefront. This is great when tangled into some nutty brown rice, but it would be even better with some toasted artisan bread.
Serves 2
Ingredients
2 teaspoons olive oil
8 oz fresh shrimp, peeled and deveined
2 teaspoons garlic, finely grated or finely minced
1 tablespoon ginger, finely grated or finely minced
1 teaspoon red pepper flakes, or to taste
salt, to taste
pepper, to taste
1/4 cup flat-leaf Italian parsley, finely chopped
zest of half a lemon &
freshly squeezed lemon juice, (a few tablespoons to 1/4 cup, or to your taste)
Directions
Heat the olive oil over medium high heat in a small or medium size skillet.
When the oil is hot, add the shrimp, ginger, garlic, red pepper flakes, lemon zest, salt, and pepper. It’s important for the ginger and garlic to be on top of the shrimp early in the cooking process to avoid any burning.
Cook the shrimp 1-2 minutes to cook on this side, lower the heat to medium-low and stir everything together.
Cook an additional 2 minutes. Swirl in the butter, pour in the lemon juice, and sprinkle with the fresh parsley.

7/06/2012

Follow This Recipe To Bake Blueberry Cheesecake Pie Easily

Blueberry cheesecake pie is a perfect summer dish. Blueberries with cheesecake and lemon are pretty the best thing ever. It’s a smaller portion than the cheesecake, it is more delicious, healthier and low-fat, this dish has more than lemon taste and the blueberry flavor. You can bake it at your home by yourself easily, you need to bake the crust, then the cheesecake, and then pour warm berries on the warm cheesecake so it sets in one big pie.

Ingredients

For the Crumb Crust:

  • 9 large rectangular graham crackers, crushed
  • 2 tablespoons sugar
  • 6 tablespoons melted butter
  • For the Cheesecake:
  • 8 oz. cream cheese, softened
  • 1/3 cup sugar
  • 1 teaspoon fresh lemon juice
  • 2 eggs
  • Freshly grated zest from 1 lemon

For the Berry Topping:

  • 2 cups blueberries
  • 1/2 cup water
  • 1/3 cup sugar
  • 1 1/2 tablespoons cornstarch mixed with 2 tablespoons cold water

Instructions

In a small bowl, combine the crushed graham crackers, sugar and butter.

Pat the crumb mixture into a 9-inch pie pan and bake for 8 minutes at 325 degrees. Let the crust cool completely.

After the crust cools, zest your lemon into a medium bowl. Add in the cream cheese, sugar, and lemon juice and and beat until smooth. Mix in the eggs until just combined.

Pour into the graham cracker crust and bake 25 minutes at 325 degrees.

While the custard is baking, combine the berries, water, and sugar in a medium saucepan and bring to a boil.

Reduce the heat and simmer, covered, for 5 minutes, stirring once or twice to prevent sticking. Remove from the heat and add the cornstarch mixture. Return to a boil and cook for one minute, stirring constantly, until the mixture is thickened. Remove from the heat and cool until the mix is warm but no longer hot.

After the cheesecake is finished, leave it out until the berries are warm. Spoon the berries over the cheesecake and chill for 1 hour.

5/08/2012

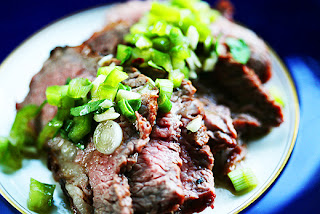
Opt For Grilled And Pan-fried Sirloin Tip Steak Recipes For Serving A Meaty Main Course


Sirloin Tip Steak
Sirloin tip steak is a good choice of meat for dieters and those who are concerned about their waistline. Yes, this beef cut is boneless, lean and contains less fats. Obtained from the rear back part of bovine, this is less tender. A simple trick to get the best-tasting sirloin tip steak recipes is marinating the meat cut for some hours prior to cooking. After tenderizing sirloin tip steak, you can grill it or simply cook it in a skillet. But, don't overcook the meat, as it will reduce the flavor and juiciness.

How to Marinate Sirloin Tip Steaks?

In the market, you will find ¾ - 1-inch thick sirloin tip steak cuts. Choose fresh meat that appears bright red hue. Preparatory step calls for cleaning it and treating in a tenderizing marinade for at least 6 hours in the refrigerator. If time permits, extend marinating time up to 24 hours. Trim the fat portions with a sharp kitchen knife, while retaining some fats. This fatty portion keeps the meat tender while grilling in high heat setting. You can use your favorite marinade for sirloin tip steak.

Generally, vegetable oil (olive oil, canola oil), acid (plain vinegar, lime juice, wine vinegar) and flavorings are used for marinating the meat. After you are done with making the liquid marinade, add the clean steaks in a plastic food storage bag and pour marinade on top of them. Close the plastic bag and keep it in the refrigerator for the suggested time period. If possible, shake the contents to coat meat cuts evenly from all sides. Also, you can reserve some of the marinade for basting meat later.

Easy Sirloin Tip Steak Recipes

Sirloin steak tastes great when cooked in medium rare doneness. Cooking sirloin tip roast and steak beyond this drains out moisture and makes the cooked meat tough. According to the thickness of meat cuts and the cooking method adopted, the preparation time differs. For ¾-inch cuts, grill for 9 - 11 minutes or cook in a skillet for 11 - 12 minutes to get medium rare steaks. Accordingly increase the cooking time by about 3 minutes for 1-inch thick cuts. Here's how to cook sirloin tip steak in two different ways.

Grilled Sirloin Tip Steak

Ingredients
  • Sirloin tip steak, 3 pounds
  • Olive oil, ¼ cup
  • Wine vinegar, ½ cup
  • Garlic clove, 1 (finely chopped)
  • Onion powder, ¼ teaspoon
  • Dry mustard, ¼ teaspoon
  • Salt, ½ teaspoon
  • Pepper, ½ teaspoon
Directions for Preparation

Grilling sirloin tip steak is considered healthy and you can try this recipe for serving low fat dinner. Prepare the marinade and tenderize meat as mentioned above. Next day, remove sirloin tip steak from the refrigerator, and bring it to room temperature. In the mean time, you can prepare the grill and oil it. As per your convenience, use a charcoal grill after burning for half an hour or gas grill at high setting. Oil the grill grate beforehand to avoid sticking.

Once the grill is ready, rub the meat with a paper towel to dry it, and season with salt and pepper. Place the meat on the grill and set the timer. According to your preferred taste, grill it for 5 minutes or more. But make sure that you turn it only once during the course of grilling. Check the internal temperature with an instant-read thermometer and see to it that the temperature falls between 145 - 160° F. You can serve grilled sirloin tip steak with a savory sauce, baked beans and vegetable salads on the side.

Pan Fry Sirloin Tip Steak

Ingredients
  • Sirloin tip steaks, 8 ounces
  • Canola oil, 1 tablespoon
  • Onion, 1 (sliced)
  • Worcestershire sauce, 4 tablespoons
  • Garlic powder, ½ teaspoon
  • Salt, ¼ teaspoon
  • Pepper, ¼ teaspoon
Directions for Preparation

Pan frying sirloin tip steaks is perfect for fixing a quick meal, when you don't have time to marinade meat for longer hours. Place clean beef cut in a shallow patter and drizzle Worcestershire sauce on top of it. Turn the meat and sprinkle garlic powder, salt and pepper. Rub seasonings to cover the meat evenly. Cover with another platter and allow the meat to absorb the flavorings for 20 minutes or more. Heat a thick skillet over medium high heat setting and add canola oil.

Reduce heat setting and add sirloin tip steaks. Cook for 12 - 15 minutes according to thickness, while turning twice in between. Or else, you can sear meat on medium-high for 2 - 3 minutes per side. Remove cooked meat into a platter and set aside. Return skillet to heat, and cook onion slices with a little oil, until they turn golden color. While serving, top them over the sirloin steaks. You can complement your meaty dish with mashed potatoes.

These sirloin tip steak recipes are excellent for serving a special treat to your loved ones. In the steak marinade recipe, you can add soy sauce, sesame seeds, honey, garlic powder, onion powder and other seasonings for increased flavor. Provided that you use a tenderizing marinade and take a note of the cooking time, a tasty sirloin steak dish is almost guaranteed.

5/04/2012

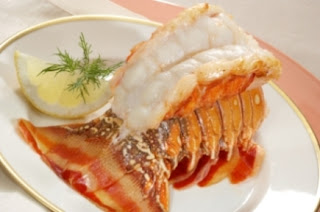
Provide You The Procedures To Cook Frozen Lobster Tails


Cook Frozen Lobster Tails
Lobster tails... the mention itself makes the mouth water. Lobster tails are very scrumptious and everybody loves to gorge on them. Cooking them however, takes a lot of effort and time. Right? Well, let me tell you, not anymore. Frozen lobster tails are a delicious almost ready to eat meat, which you can easily store in your refrigerator. Frozen lobster tails can be eaten steamed, grilled, boiled or baked. Here is a simple method to cook frozen lobster tails.

Procedures to Cook Frozen Lobster Tails

Defrost the Lobster Tails
The first step in cooking frozen lobster tails is to thaw the lobster completely. Defrosting is essential prior to cooking because it helps in maintaining the flavor of the lobster tails. You may cook lobster with ice intact, but the resultant meat will be less delicious than the one which has been thawed before.

When you get the lobster tails from the market, keep them in the refrigerator for a day. Remember not to take out the lobster tails from the packaging before keeping in the refrigerator. After twenty-four hours, the lobster tails will get defrosted. Another method to defrost the lobster tails is to keep them in water for some time. This is a quicker way to defrost them. While defrosting in water, keep the lobster tails in storage bags before immersing them in water so that the water does not reach the meat and render it tasteless. Some people even use an oven to defrost the lobster tails, but personally, I will not recommend it as the lobster might lose its softness because of the heat in the oven.

The best way to cook frozen lobster tails is by thawing it in a refrigerator overnight, before cooking. After the lobster tails have been thawed, you may choose any of the lobster recipes to cook frozen lobster tails of your choice.

Bake the Lobster Tails
To cook frozen lobster tails which are baked, you have to use an oven. Start with pre-heating the oven to 400 degrees Fahrenheit. Meanwhile, wash the lobster tails with cold water, after they have been thawed, using the methods mentioned above. After washing and drying them, put them on a baking sheet. Now make a lengthwise cut on the shell in such a way that the meat is visible. Now keep the lobster tails for baking in the oven for about ten minutes. Take the meat out after ten minutes, sprinkle salt, pepper and some herbs such as oregano on top of it for taste. A scrumptious, tender, baked lobster tail is ready.

Steam the Lobster Tails
For cooking frozen lobster tails which are steamed, first of all clean the lobster tails with cold water so that the germs and bacteria are washed away. Once the lobster tails have been cleaned and dried, skewer the lobster tails before setting them up for steaming in a steamer. This is done so that the lobster tails do not curl upon steaming. Now put the lobster tails in the steamer and cook for about three minutes. Remember to leave enough space in between the lobsters while steaming so that they are cooked on all sides.

For steaming, you may put water or beer or white wine in the steamer. Alternately you can make a sauce by mixing wine, cream and paprika and steam the lobster in it. After the steaming has been done, put the lobster tails under cold water for a while. Steamed lobster tails are now ready to be served. Just like a steamed lobster, grilled lobster is also quite tasty.

Here's hoping that now you have understood how to cook frozen lobster tails at home. A frozen lobster has many benefits compared to a live lobster. A frozen lobster costs less, is easy to prepare and can be stored for a very long time in the refrigerator, until you are ready to cook it.

4/27/2012

Gluten Free Ezekiel Bread Would Do Better As An Option In One's Diet


Gluten Free Ezekiel Bread
What is Ezekiel bread? This kind of bread gets its name from the prophet Ezekiel who ate this as his only form of sustenance while being in the desert for 390 days. This bread was specially prepared by him through God's instructions to be able to survive only on this and water. This kind of bread can be bought from health stores, from Food for Life (who make Ezekiel bread and other organic eats), who were the first to be able to combine six kinds of organic legumes and grains which when sprouted and then mixed, make up the bread.

The sprouting stage makes all the difference, since this process allows one to easily digest it, while also creating a protein that is very close in relation to what is present in eggs, whey and milk. The protein's quality is just as good as normal protein, and comes surprisingly close to it in terms of comparison and nutrition. It also contains amino acids that are obtained from vegetable sources.

The sprouting process when done, releases a component called maltose, which is a grain sugar that isn't easily absorbed by the body. This in turn brings on a low glycemic response making it an ideal food choice for weight watchers and those who are diabetic. So is Ezekiel bread gluten-free? No it's not, since the grains have naturally occurring gluten in their content. Gluten free Ezekiel bread can be made at home, since the ingredients can be replaced with gluten-free ones to make it almost like its original counterpart.

Ezekiel Bread IngredientsThe original ingredients that make up this bread are those that can be substituted when trying to make bread recipes that are gluten free. The ingredients of this bread are.
  • Organic-sprouted whole oats
  • Sprouted whole barley
  • Organic sprouted whole millet
  • Malted barley
  • Organic sprouted whole kernel corn
  • Organic sprouted whole wheat
  • Fresh yeast
  • Organic sprouted whole rye
  • Organic honey
  • Sprouted whole brown rice
  • Soy lecithin
  • Molasses
Ezekiel Bread Recipe (Gluten-free Version)

Celiac disease is a condition that a lot of people suffer from because their system rejects the ingredient gluten. For those who wish to cancel out this add-on in meals, can try out this great recipe that doesn't contain traces of this ingredient.

What You'll Need:
  • 1 cup quinoa
  • ½ cup rice flour
  • 1 teaspoon of baking soda
  • ½ cup water
  • ½ cup coconut flour
  • 1 cup millet
  • 4 tablespoons of coconut oil
  • 3 teaspoons of baking powder
  • 5 eggs
  • ½ tablespoon of sea salt
  • 2 cups of low-fat milk
  • 1 cup of sesame seeds
  • 2 tablespoons of honey
Method of Preparation:

Pre-heat the oven to 350°F before you get started on making the bread. 24 hours prior to the day that you make your bread, soak the quinoa, sesame seeds and millet in lukewarm water until it is ready to be added to the mixture once it has softened the next day. This part in the process is necessary to make them sprout in a span of 24 hours to help release its vital nutrients. Strain out the water the next day and make two portions of this mixture. One at a time, use the first portion and put this into the mixer, blending it with milk until it has this nice consistency; repeat this again for the second half.

Mix in your baking powder, coconut, and rice flour along with the baking soda and blend thoroughly. Grease a bread pan before pouring in your mixture, and slip this into the oven for about an hour. To check if it is done, you have to insert a knife into the bread and make sure it comes out clean. You can always put an aluminum foil atop the bread pan to avoid the surface of the bread from browning too soon, leaving the center uncooked in the process. You can then slide your piping hot bread out of the oven, slicing these into medium-sized portions. Coat these with honey and sprinkle with sesame seeds, before you bite in. You can have this also with peanut butter, jam or a nice generous layer of cream cheese, turkey slices and olives.

Gluten free Ezekiel bread would do better as an option in one's diet when keeping health in mind. Being also a little on the expensive side, this would make for a great recipe to cut down on the extra costs when bought from a store. Have a healthy tomorrow.

4/16/2012

Check It Out - Tomato Pie Recipe Is Easy To Make And Tastes Great!

Before I disclose to you the promised tomato pie recipe, let's bite deeper (pun intended) into the crust and discover some interesting facts about this incredible edible. Tomato pie is a close derivative of the Sicilian pizza and is very popular among American people of Italian and Sicilian heritage. There are quite a few different types and variants of tomato pie and most of these variants are attributed to various different American regions, based upon where each variant is believed to have originated from. For instance, the most elementary form of this tomato recipe is believed to have originated from Utica where it has been made and sold since as early as 1914. On the other hand, the Trenton tomato pie variant is traced to this capital city of New Jersey. Tomato pies are an inseparable part of Italian American cuisine and their cheese-n-spices flavor make them a hit, no matter what ethnic palates experience them. Praises apart, let's take a look at a couple of interesting tomato pie recipe.

Utican Tomato Pie Recipe

This is the basic, most elementary recipe for tomato pie which is believed to have originated in Utica, the proverbial birthplace of tomato pies! Check it out - it's easy to make and tastes great!

Ingredients
  • Crushed Tomatoes (canned) - 32 ounces
  • Extra Virgin Olive Oil - 3 tablespoonfuls
  • Garlic - 2 cloves
  • Dried Oregano - 1 teaspoonful
  • Pizza Dough - 1 pound
  • Pecorino Romano Cheese (grated) - 3 tablespoonfuls
  • Salt to taste
  • Pepper to taste
Preparation Method
  • Grease a cookie sheet with the extra virgin olive oil and stretch pizza dough to cover it.
  • The dough layer should have a minimum thickness of at least 1 to ¾ th of an inch.
  • Preheat the oven to about 450 °F and allow the dough to rise slightly.
  • Meanwhile, start preparing the sauce by first heating a saucepan moderately and then sautéing garlic cloves in the olive oil on medium flame till the garlic cloves turn slightly golden.
  • Next, add the oregano, salt, pepper and crushed tomatoes to the sautéed garlic and cook for about 10-15 minutes or till the sauce assumes a thick, creamy texture.
  • Take the frying pan off the flame, and allow the sauce to cool till it has reached room temperature.
  • Pour this sauce over the pizza dough and place this sauce topped dough into the preheated oven.
  • Bake at 450 °F for about 20 minutes
  • Take the pie out and sprinkle the grated Pecorino Romano cheese on top of it.
  • Allow it to cool before serving.
While the pie cools, the escaping heat partially melts the cheese sprinkled on top, giving your Utica tomato pie a cheesier edge (wink!)!

Tomato Pie With Bacon Recipe

This recipe is for those incorrigible meat lovers (myself included!) who cannot be satisfied with an all-veggie fare and must discern at least a slight hint of non vegetarian ingredients to consider the dish worthy of their palates!

Ingredients
  • Deep Dish Pie Crust (about 9 inches thick) - 1 unit
  • Large Tomatoes (sliced and peeled) - 4
  • Scallions (finely sliced) - 3
  • Bacon (chopped, cooked, drained) - 1 pound
  • Dried Oregano - 1 teaspoonful
  • Powdered Garlic - ½ teaspoon
  • Red Pepper (crushed) - ½ teaspoon
  • Mayonnaise - ¼ cup
  • Shredded Cheddar Cheese - 2 cups
Preparation Method
  • Fill alternating layers of tomatoes, scallion, basil, garlic powder, bacon, red pepper and oregano into the pie crust.
  • Keep the oven preheated at 375 °F while you're layering the pastry shell.
  • Mix the shredded cheese and mayonnaise together and spread this mixture over the yet-to-be-baked pie's surface.
  • Cover this pie with an aluminum foil and place it inside the preheated oven.
  • Bake for about 30 minutes.
You can either make the crust from scratch or you can get a ready-to-use one from your neighborhood grocer. Serve it warm or allow it to cool - take your pick. It tastes great both ways!

You can try a lot of other variants such as spinach, chicken or green tomato pie - with an ounce of imagination and a sprinkle of innovation, you can very well come up with your own recipe variant! Try different various ingredients for the sauce or pie filling along with the staple tomatoes and cheese - you never know, you could actually have a whole new tomato pie recipe named after you!

4/11/2012

Different Ways To Make Shrimp Tempura Roll

Tempura is a Japanese dish made by deep-frying sea food or vegetables. Even though, it is a Japanese delicacy, it is believed that tempura is Portuguese in origin and is introduced to Japan during the sixteenth century by the early Portuguese traders and missionaries. However, it is popular as a Japanese dish, which is commonly served as appetizers. Shrimp tempura can be served as rolls too. Let us take a look at how to make shrimp tempura roll.

Shrimp Tempura Roll Ingredients

Tempura is a dish which consists of deep-fried seafood or vegetables, that are coated with special batter. In order to make shrimp tempura rolls, firstly, shrimp tempura is made by deep-frying the shrimp coated with the batter. This shrimp tempura is then wrapped, with some other ingredients, so as to form rolls. Apart from fresh shrimp (cleaned, peeled and deveined), you need, rice flour or all-purpose flour, icy cold water, egg and Japanese rice wine for making the batter. Some people use all-purpose flour with a small amount of cornstarch, egg, cold water and a teaspoon each of baking soda and baking powder, etc., for making batter. There are various recipes for preparing the batter. In order to prepare the rolls, nori and sushi rice will be required. Let us take a look at an easy shrimp tempura roll recipe.

Shrimp Tempura Recipe

In order to prepare shrimp tempura roll, you have to first make shrimp tempura. Prepare the shrimp by cleaning, peeling and deveining. Cut the tail and the sharp end in between the tail fins. Place the shrimp on paper towels, so as to get rid of moisture. Now, you can fry the shrimp. Before that, you have to prepare the batter by mixing the flour, one egg, water and rice wine. Take a bowl and mix the egg with half cup cold water. Once it combines well, add a tablespoon of rice wine and mix thoroughly. The next step is to add the flour. You can either use a cup of rice flour or a mixture of ¾ cup all-purpose flour and ¼ cup of corn flour. If you go for the second option mix the two flours before adding them to the bowl. Now, add the flour to the bowl and mix well. Small lumps are allowed, but, the batter must have a fairly thin consistency. Heat the cooking oil to a temperature of around 350° F. Flour the shrimp and dip them in the batter before frying them. Fry the shrimp till they get golden brown in color. Place them on wire racks or paper towels, so that excess oil is absorbed. Your shrimp tempura is ready. Now, you have to wrap them in rolls.

Wrapping Shrimp Tempura Roll

You have to use nori and sushi rice to wrap shrimp tempura roll. Take a nori sheet and divide it into three equal pieces. Now, place a sushi mat and a plastic wrap on top of that. Place a nori piece (with smooth side facing downwards) on top of the plastic wrap, which is kept over the mat. Now, spread a thin layer of sushi rice (1/10 of an inch in thickness) over the nori sheet, so that a thin margin on one edge (lengthwise) of the nori sheet is left uncovered (by ¾ of an inch). Now, flip the nori, so that the smooth side faces upwards. Now, make a wall of rice on the side, which is opposite to the uncovered strip on the nori sheet. Now, you have a nori sheet with one side having an uncovered margin and the opposite side with a wall of rice, that extends from the edge by ¾ of an inch. This extended wall of rice will cover the uncovered strip, while the contents are wrapped in a roll. Now, place the shrimp tempura, horizontally across the nori, with the tail ends extending over the edge. Now, lift both sides of the sushi mat and apply pressure, so that the nori with rice and shrimp get wrapped tightly to form a roll. The end product will be in the form of a long roll with shrimp tempura in the center, covered with nori and sushi rice. Now, remove the plastic wrap and mat and cut the cylindrical roll diagonally into ½ inch thick slices, that can be served with dipping sauce. You may also read more about tempura batter recipe and tempura sauce recipe.

Now, you know how to prepare shrimp tempura roll. All you have to do is to try this recipe and enjoy the delicacy. As shrimp tempura calories may vary with the ingredients, you have to keep a check on the contents.

4/01/2012

Enjoy The Healthy Quinoa Breakfast Cake Recipes Right Now!

Wheat, barley, rice ... these are well-known and very popular grains used in everyday cooking. For a healthier and different seed to add an exotic flavor to your dishes, have you tried quinoa? This Peruvian grain or pseudocereal is actually the seeds of a type of goosefoot plant. Pronounced as "keen-wa", quinoa is a staple ingredient in South American cuisine and was treasured as the "mother of all grains" by the Incas. Indeed the health benefits of quinoa rank it as a veritable treasure chest of nutrients, especially when compared to other cereals and grains. To add to its appeal, its use is not restricted to South American dishes and quinoa can be found in many recipes. In this article, we look at some quinoa breakfast cake recipes for a healthier breakfast snack or dish alternative.

Gluten-Free Quinoa Cake
Ingredients:
  • 1½ cups quinoa flakes
  • ½ cup sorghum flour
  • ½ cup tapioca starch
  • ¾ cup almond meal flour
  • ½ teaspoon sea salt
  • 2 teaspoons ground cinnamon
  • 1 cup organic light brown sugar
  • 1 teaspoon xanthan gum
  • 1 teaspoon baking soda
  • 2 large eggs, organic (egg substitute can also be used)
  • ½ cup light olive or safflower oil
  • ¼ cup sorghum molasses or raw organic agave
  • 2 teaspoons bourbon vanilla extract
  • 1 cup grated carrots
  • ½ cup grated coconut, sweetened
  • ½ cup seedless raisins
  • ¼ cup orange juice
Method:
  1. In a bowl, whisk the 2 types of flour, the quinoa flakes, starch, soda, salt, gum and cinnamon
  2. In a separate large bowl, beat the eggs, oil, sugar, molasses, extract and orange juice
  3. Mix together the contents of both the bowls and beat well. To this mixture, add the carrots, coconut and raisins, stirring well with the addition of each ingredient
  4. Preheat the oven to 350 degrees F. In a 10x13 inch baking pan, place greased foil or parchment. Leave the cake batter to rest
  5. Pour the cake batter into the baking pan. Make sure the batter is spread uniformly in the pan
  6. Bake for 25-35 minutes. Check if cake is ready, by inserting toothpick into cake center. The center should be quite firm to touch, not gooey or sticky
  7. Leave cake to cool, then cut into 15 pieces and wrap in foil. Store them in a bag and refrigerate for later use
Spicy Apple Quinoa Breakfast Cake
Ingredients:
  • 2 cups cooked quinoa
  • ¼ cup whole oats
  • ½ cup agave nectar
  • 2 whole apples, medium-sized with skin, cored and grated
  • ½ cup raisins
  • ½ cup sunflower seeds
  • ½ cup any light oil (sunflower, safflower)
  • 1⅓ cups whole oat flour
  • 2 teaspoons chia or flax seeds, finely ground
  • 2 teaspoons pure vanilla extract
  • 2 teaspoons cinnamon, ground
  • 1 teaspoon cardamom
  • 1 teaspoon ginger, ground
  • 1 teaspoon apple cider vinegar
  • 1 teaspoon baking powder
  • ½ teaspoon baking soda
  • ½ teaspoon salt
Method:
  1. Preheat the oven to 350 degrees F. Use a 9 inch square pan for baking and grease or line it with parchment
  2. Mix the apple, agave nectar, oil, flax or chia seeds, quinoa, vinegar, vanilla, sunflower seeds and raisins in a bowl. Keep aside
  3. In another bowl, sift the oat flour, baking powder and soda, ginger, cinnamon, salt and cardamom. Add oats to this bowl and mix well
  4. Add the contents of the wet mixture bowl into the first bowl and stir well. A thick batter should be formed
  5. Pour the batter into the baking pan and spread evenly. Make sure the top is smooth. Bake for 30-40 minutes. You can test if the cake is ready, by inserting a toothpick into the center. If it comes out clean and dry, the cake is ready. Remove cake from oven and leave to cool. After it has cooled completely, cut into slices

3/24/2012

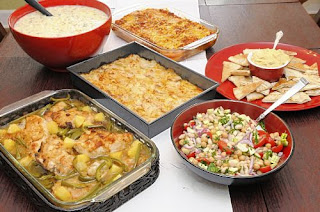
Good Potluck Dinner Ideas To Make Your Party A Success

A potluck dinner party is a nice way to unwind and relax after a long weekday. As a hostess you do not have to worry about preparing a full course meal for the dinner party. In a potluck dinner party each guest brings one dish of their choice to the party to be served and shared with friends. If you are the one hosting the party, make sure that you inform your guests well in advance the theme of your party or the kind of food that they are expected to bring along. Plan well in advance or you might end up with three or four salads and no main course.

Give your guest plenty of choice and enough leeway to choose what they want to bring to the potluck party and do not force them to bring any particular dish if they are not comfortable with it. Remember that they are your guests and avoid using them like a restaurant to order food. On the other hand if you are invited to a potluck party, you must be wondering what to bring to a potluck dinner. Well, you can bring any dish that travels well and tastes good. Although hosting a potluck party might seem easy, nevertheless you should have some good potluck dinner ideas to make the party memorable and fun.
Ideas for Potluck DinnerThere are a few things that you should keep in mind when you host a potluck dinner party.
  • Decide on the Menu: When you are hosting a potluck dinner, you should give some thought to the menu if you want to avoid a mismatch of too many cuisines or an abundance of similar type of dishes. This is very important as you might end up with too many casserole dishes and without any side dish or dessert.
  • Decide on the Theme: Choosing a creative theme for the potluck party is also equally important. Choose a potluck theme that your guests might be excited about like a French, Italian or Spanish themed menu. Inform your guests about the theme and ask each guest to bring a dish that echoes this theme. If you are having an Italian themed potluck party your guest can bring different pizzas, pastas and antipasto platter. For more variation you can even have an oriental themed potluck dinner party where the guests can prepare one Chinese or Thai dish of their choice.
  • Determine the Quantity of Food Required: Next decide how many appetizers, main course, side dishes and desserts are required. The best option is to opt for four to six appetizers, three to four main courses, four to five side dishes and two good desserts for a party of twelve to sixteen people.
  • Make Arrangement for Beverages: To wash down all the lovely food, you need some good beverages. As hosts you can arrange for the drinks with a classic holiday punch and couple of bottles of red and white wine. Make sure that you have an adequate selection of both alcoholic and non alcoholic drinks.

3/15/2012

Shark's Fin Soup Enhances The Taste Of Anything

Shark's fin soup, shark's fin omelet and braised shark's fin soup with crab meat are the most expensive dishes to be present in a Chinese banquet. Shark's fin is nothing but a soft tissue. Its cost is proportional to its length. The length of a shark's fin can vary from an inch to a foot. The cost also depends on the amount of cartilage. Shark's fin in itself is tasteless but has a strange capability of enhancing the taste of anything that it is cooked with. In the market, shark's fin is normally available in two forms, namely; frozen and dried. Dried shark's fin needs to be tenderized before using in the food recipes.

Ingredients
To prepare shark's fin soup, the main ingredients are - 16 oz can of shark's fin, 1 chicken breast and 4 cups of water. To spice up the dish, we will need 2 tablespoons sherry, 3 tablespoons oil, 2 tablespoons of cornstarch, 1 ginger root, some dried black mushrooms and 2 scallion stalks. Salt can be added as per taste. 3 tablespoons of oil is enough to cook the entire dish.

Procedure
The chicken breast and the mushrooms are shred first and the scallions are cut into two inch sections. The ginger pieces are then sliced to very small pieces. The sliced ginger pieces, the scallion stalks, the canned shark's fin, sherry and water are then boiled together, in a pan for around 15 minutes. The shark's fin is then drained out, while the liquid, scallions and ginger root are discarded. Then stir fry the chicken pieces in the oil for around one minute, until they lose their pinkness. The shark's fin, remaining sherry, and shredded mushroom pieces are added to the fried chicken pieces and boiled for around 30 minutes. Salt is sprinkled over during the boiling process. The amount of salt to be sprinkled, depends on the maker's taste. Cornstarch is then the preparation to thicken the soup.

Ingredients
The main ingredients are ½ a cup dried shark fin, hot chicken stock, six eggs, 2 tablespoons of scallion stock, 1 cup stock, 2 slices of ginger root and 2 tablespoons of sherry. Pepper and salt are needed to spice up the preparation. 4 tablespoons of oil is needed for the frying process.

Procedure
The shark's fin first needs to be tenderized. It is soaked in cold water for an hour and the water is then drained out. The ginger roots are then cut into very small pieces and the scallion stalks are sliced into 1 inch sections. The tenderized shark fin is then combined with the stock, sherry and salt and pepper. Salt and pepper is added as per the taste desired. Scallions and ginger root are stir fried in the oil for a few minutes. The preparation of shark fins is then added to the pan and cooked for 5 minutes on medium low heat. The remaining liquid, scallions and ginger root are then drained out from this preparation. Then beat the egg and pour it over this shark fin mixture. It is allowed to settle down on the preparation. It is repeatedly tossed and turned. The care should be taken that the omelet is moist, but not runny.

Ingredients
The main ingredients are canned shark's fin and fresh crab meat. To spice up the dish we need chicken stock, salt, sugar, pepper, 3 tablespoons of ginger juice, potato starch and 3 tablespoons of Chinese wine. 1 tablespoon of Chinese sesame oil is enough to cook the mixture.

Procedure
The crab meat is boiled along with 2 tablespoons of ginger juice and 3 tablespoons of Chinese wine. The boiled crab meat is then strained and the chicken stock is boiled. The chicken stock and shark's fin is added to the boiled chicken stock. Salt, sugar, pepper, chicken powder and the remaining ginger juice is added to the preparation and the entire mixture is again boiled at medium heat. Potato starch along with water is finally added to the soup, to thicken it.

It is the slippery and glutinous property of shark's fin that causes its soup to be extra thick. In many restaurants cornstarch or potato starch is not even added to the soup. From a health perspective, shark's fin is believed to strengthen the internal organs. Though the killing of sharks is banned all over the world, but shark's fin, till date, continues to remain one of the most relished Chinese food recipes ever.

3/06/2012

Healthy Recipes For African Chicken Wings


This Spicy African Chicken Wings Recipe is a nice change from ordinary appetizers. Although the list of ingredients are on the long side, you'll love the end result. African Chicken Wings feature a lively jolt you get from red pepper. Now, here's a great appetizer!

Ingredients:

FOR THE WINGS-----
4 Garlic cloves
2 Shallots
1 1/2 ts Salt
1 tb Chinese 5 spice
2 ts Paprika
1 ts Dried rosemary -- crumbled
1/2 ts Cayenne -- or to taste
2 tb Vegetable oil
4 lb Chicken wings; about 20-24

Tips removedFOR THE SAUCE-----
1/3 c Natural style peanut butter
1/4 c Canned cream of coconut --
Well stirred
2 Garlic cloves -- chopped
1/4 c Water
1/4 c Red bell pepper -- chopped
1/8 ts Dried hot red pepper flakes
Or to taste
1 ts Soy sauce
Coriander sprigs -- for If Desired

Procedures:
THE WINGS: Prepare the chicken wings: Mince and mash the garlic and
shallots to a paste with the salt. In a large bowl stir the paste together
with the 5 spice powder, paprika, rosemary, cayenne, and the oil. Mix well.

Add the chicken wings. Toss and stir them until they are completely covered
with the marinade. Let them marinate, covered and chilled for 4 hours or
over night. Arrange the wings, skin side up, on the rack of a foil lined
large broiler pan and bake them in the upper third of a preheated 425F oven
for 25 to 30 minutes or until they are golden. The wings may be prepared
one day in advance, kept covered and chilled and then reheated before
serving.

THE SAUCE: In a blender, blend together the peanut butter, cream
of coconut, garlic, water, bell pepper, red pepper flakes and the soy sauce
until the mixture is smooth, season the sauce with salt, to taste.

THE PRESENTATION: Transfer the sauce to a serving bowl set on a platter.
Arrange the wings around the bowl and garnish the platter with the
coriander.

3/02/2012

Favorite Recipe For Chicken TIkka Masala

I love Chicken TIkka Masala! No doubt is one of my many favorite recipes. Its a little hard to do and i would rather buy it in jersey city, but worth it. Indian Recipe, I tasted chicken tikka masala when I was Shooting a film of mine at his house. His mother made it and it was so spicy. It was really Hot!!. But i love it, i can't get enough of it.

Things needed:
Marinating the Chicken:


3-4 boneless chicken breasts, skins removed and cut into bite-sized pieces
250g thick natural yogurt
1 tablespoon fresh ginger, minced
2 teaspoons ground cumin
1 teaspoon ground cinnamon
2 teaspoon chili powder
2 teaspoon fresh cracked pepper
Salt
Skewers, If using wooden skewers completely submerge them in water for approx. 30 minutes. This will hinder them from catching fire while grilling.

Tomato Gravy:
250g canned cocktail tomatoes
250g heavy cream
2 garlic cloves, minced
2 red chilies, finely chopped
2 teaspoons ground cumin
2 teaspoons paprika powder
1 tablespoon ghee or clarified butter
Handful of coriander leaves/cilantro, chopped
Salt and pepper

Method: Mix all of the ingredients for the marination in a large bowl. Thoroughly mix until the chicken is nicely coated. Cover and refrigerate overnight. On the next day, either prepare your charcoal grill or heat up the grill function of your oven to high. Thread the chicken pieces onto the skewers, discarding the marinade.
Grill the chicken evenly on all sides, until juices run clear – approx 5-6 minutes.

To prepare the gravy, heat a large skillet to medium and melt the ghee/clarified butter. Sauté the garlic and chopped chilies until fragrant.
Sprinkle the ground cumin, paprika powder and a pinch of salt. Sauté for a further minute or two until the mixture turns into a paste-like texture. Pour in the canned tomatoes, scraping the bottom of the skillet to deglaze it and to release any bits stuck to the pan.

 Simmer uncovered for approx. 10-15 minutes on low heat until the sauces begins to thicken, then add the grilled chicken pieces and cream. Simmer for a further 10 minutes, thickening the sauce further and to heat the chicken and cream through. Serve sprinkled with fresh chopped coriander leaves and with steamed Basmati rice, fresh naans and pickles.

2/27/2012

Bouillabaisse-French Foods That You Must Be Aware Of

There are two ways of serving Bouillabaisse; as a stew with the seafood, shellfish and vegetables served in a broth. Or, the more traditional French manner in which a mix of seafood, shellfish, and vegetables are served on a platter with the broth served on the side with grilled bread slathered with aioli, a garlic mayonnaise, or rouille, a spicy saffron mayonnaise made of olive oil, garlic, saffron and cayenne pepper.

Seafood Ingredients:
  • 1 lb of fresh clams
  • 1 lb of fresh mussels, rinsed and bearded
  • 2 lbs of cod, but into 1" pieces  (can use a mix of cod, tilapia, snapper, grouper, John Dory- skinned)
  • 1/2 lb of clam strips (optional)
  • 12 raw jumbo shrimp, shelled and deveined, keeping tails intact (shells reserved)
Broth Ingredients:
  • 1/3 teaspoon saffron
  • 1/4 cup extra virgin olive oil
  • 2 carrots, cut into 1/2" pieces
  • 2 stalks of celery with leaves, chopped
  • 1 large onion, chopped
  • 3 large cloves of garlic, finely chopped
  • 1 28-oz can diced tomatoes
  • 1 tsp fennel seeds
  • 1 bay leaf
  • 1/2 teaspoon thyme
  • 1 tsp fresh tarragon, finely chopped
  • 1 teaspoon sea salt
  • 2 teaspoons cracked black pepper
  • 1 cup chicken stock (or water)
  • 1 cup of dry white wine
  • 2 cups clam juice
  • 10 red or white baby potatoes, cut in half
  • 3 cups of water
  • Salt & White Pepper to taste
  • Garlic Aoili (store bought brand such as Saratoga's Garlic Curry Aioli)
  • Garnish with Parsley leaves
Directions:
Step 1: The Broth
  1. Combine the saffron and hot water in a small bowl and set aside to infuse.
  2. Heat olive oil in a large pan, over medium high heat, saute onion, carrot and celery until vegetables soften, about 15 minutes. After 10  minutes, add garlic.
  3. Add tomatoes, fennel seeds, saffron, thyme, tarragon, salt, pepper, and juice of one orange. Simmer 5 minutes.
  4. Add clam stock, wine, and water and bring to a boil. Reduce heat to low and simmer for 1 hour. The longer this simmers  the richer the flavor.
  5. Note: You always want to have enough water in the pot to cover all ingredients, so start with 2 cups and add more as needed. I used 3 cups total.
Step 2:
  1. Turn heat up to medium and add potatoes and cook until 1/2 done, about 5 minutes
  2. Wash mussels, remove shells from shrimp and devein, and cut fish into 2-3" pieces
  3. Add fish to pot and cook for 5 minutes, gently boiling, over medium heat (lower heat if too high/rapid boils)
  4. Add mussels, cover the pot and cook until mussel shells begin to open. (Discard unopened mussels.)
  5. Add shrimp, cook until they turn pink
  6. Taste broth and season to taste
Plate the Dish:
  1. Ladle soup among large serving bowls and garnish with fresh parsley leaves. Add a dollop or two of aioli to the broth and stir in. Serve with crusty bread on the side. For a heartier treat you can add Gruyere cheese and make open-faced grilled cheese sandwiches to serve with the soup. Bon appetit!

2/21/2012

How To Make Buffalo Chicken Pizza

Are you looking for recipes on how to make Buffalo chicken pizza at home? Then what are you waiting for? Read the following article now.

Oh my gosh!! Just the thought of eating a hot, cheesy, thin crust buffalo chicken pizza makes my mouth water. Whether there's a party in the house, your friends are coming over for to hangout, or you're in the mood to relax at home and eat comfort food, Buffalo chicken pizza can always come to the rescue. This pizza not only looks amazing, it tastes fantastic. And the best part about learning how to make buffalo chicken pizza is that you can be creative and prepare it in different ways. So, take a look.

Buffalo Chicken Pizza Recipe #1

Ingredients
    3 scallions, sliced
    3 tablespoons hot sauce, mild
    2 tablespoons butter
    2 teaspoons grill seasoning
    1 tablespoon Worcestershire sauce
    1 cup Monterey Jack cheese, shredded
    1 pizza dough crust, pre-baked
    ½ cup blue cheese crumbles
    ½ cup tomato sauce
    ¾ lb. chicken breast cutlets
    Extra virgin olive oil, for drizzling

Directions
Preheat the oven at 425º F and preheat the grill at high as well. Meanwhile, take a bowl and place chicken breast cutlets in it. Drizzle extra virgin olive oil over it (eyeball it) and sprinkle the grill seasoning as well. Use your fingers to coat the seasoning properly. Once the grill is hot, grill the chicken breast cutlets for about 2 to 3 minutes on all sides. Till then, we will prepare the sauce for the pizza. In a bowl, combine butter, Worcestershire sauce, hot sauce, and tomato sauce together. When the chicken is properly grilled, place it on the cutting board, and cut into slices (however big or small you like). Coat the pizza dough with the prepared sauce and cover with the buffalo chicken slices. Spread both cheeses on top and place the pizza inside the oven for about 15 to 18 minutes to bake. Just before the pizza is ready, sprinkle scallions on top. When your pizza is nice and crispy, remove from the oven, cut into slices, and serve hot.

Buffalo Chicken Pizza Recipe #2

Ingredients
    3 cups diced chicken, cooked
    2 pizza crust, pre-baked
    2 cups mozzarella cheese, shredded
    1 cup barbecue sauce
    ½ cup celery stalks, sliced
    ½ cup buffalo wing sauce
    2/3 cup Gorgonzola cheese

Directions
To prepare this delicious homemade pizza, we need to preheat the oven at 450º F. Take two baking sheets to place 2 pizza crusts on top. First we will spread the barbecue sauce on both the crusts (you can also use the regular pizza sauce) and sprinkle sliced celery on top. In a bowl, combine cooked chicken pieces with the Buffalo wing sauce. In a separate bowl, mix Gorgonzola and mozzarella cheese together. Evenly place it on both the pizza crusts and top with both cheeses. Place the pizza crusts inside the oven and bake them for 15 to 20 minutes. When the cheese begins to melt and the crusts turn crispy, remove the pizzas from the oven, and cut them into slices. Serve the buffalo chicken pizzas hot.

Buffalo Chicken Pizza Recipe #3

Ingredients
    6 oz. cheddar cheese, shredded
    4 oz. cream cheese, softened
    4 tablespoons half & half
    2 tablespoons butter, softened
    2 chicken breasts, grilled & sliced
    2 celery stalks, sliced
    1 tablespoon apple cider vinegar
    1 pizza dough, pre-baked
    ¼ cup Tabasco sauce
    Blue cheese, crumbles
    Hot sauce, for drizzling

Directions
Preheat the oven at 475º F. Meanwhile, take a pan to combine Tabasco sauce with butter and apple cider vinegar. Mix everything properly and add the chicken breast pieces in. Once the chicken is coated thoroughly, turn the stove off and leave it on one side. Next, we need another bowl to mix cream cheese with blue cheese and then add half & half in simultaneously. Place the pizza dough on a baking sheet and spread the cream cheese-blue cheese mix on top. The next layer will be of the chicken breast pieces. Top with cheddar cheese and place in the oven for 18 to 20 minutes. Just before the cheese begins to melt and the crust turns crispy, sprinkle celery. To serve, drizzle hot sauce on top and blue cheese (if you want).
Weren't these recipes simple enough? You can easily learn how to make Buffalo chicken pizza at home with very little preparation time. Enjoy the wonderful flavors and do try making the pizza in different ways to see which one you love the most.

2/14/2012

Japanese Cuisine: Kaiseki-Ryori

There are several types of Japanese cuisine. Kaiseki-Ryori is one of them. It originally was a simple course meal served at traditional Japanese tea ceremonies. However, today, it is a formal course meal based on the three principles of using seasonal ingredients, making full use of the respective tastes of the ingredients themselves, and preparing each dish with a hospitable heart.

Moreover, it is also based on the dietary rule of Ichiju-Sansai which consists of one soup (Ichiju) and three side dishes (Sansai) such as Namasu (raw fish marinated in vinegar), Nimono (simmered dish), and Yakimono (grilled dish). Kyo-Ryori was born in Kyoto, a city that served as the capital of Japan for a long time. There are roughly four types of cuisine in Kyoto: Daikyo-Ryori (cuisine of the nobility), Honzen-Ryori (food of the Samurai), Shojin-Ryori (vegetarian cuisine of the Buddhist monks), and Kaiseki-Ryori (served during tea ceremonies).

Because Kyoto is surrounded by mountains and far from the sea, local ingredients from the nearby areas are used. The vegetables of Kyoto are known as "Kyo-yasai" such as Kamo-Nasu (type of eggplant) and Shogoin-Daikon (type of Japanese radish). Daikyo-Ryori, Honzen-Ryori, Shojin-Ryori, and Kaiseki-Ryori using Kyoto's local food products are collectively called Kyo-Ryori in general. Both Kaiseki-Ryori and Kyo-Ryori can be enjoyed at restaurants called Kappo and Ryotei.

Kappo refers to the entire genre of Japanese cuisine utilizing a variety of cooking methods. Kappo's "Ka" means to cut ingredients with a knife while "Po" indicates the act of heating them by grilling, simmering, or deep-frying. High-class Japanese restaurants are called Ryotei. In a typical Ryotei, you will find a Japanese garden while the interior is decorated with art works. The dishes used to serve the food are also traditional, valuable pieces.

Therefore, you are introduced to the culture of Japan through every little detail. Many of the Ryotei do not accept first-timers as they require their regular guests to accompany you on your very first visit. In Japan today, various types of cuisine from around the world are enjoyed.

Sosaku-Ryori is a term that describes the type of cuisine fusing cooking methods and ingredients of Italian, French, or Chinese cuisine with Japanese cuisine. Kani Doraku is a crab restaurant whose main branch is located in Osaka. Here, you can enjoy a variety of crab dishes such as "Kani-Suki" and "Kani-Shabu". You can spot this restaurant right away since it has a giant crab billboard at its entrance.